Place the cauliflower florets into a large bowl of lightly salted water; allow to stand for 20 minutes. Drain well, and arrange on a sheet of heavy aluminum foil on a baking sheet. Spray the olive oil cooking spray evenly on the cauliflower.
Preheat the oven’s broiler and set the oven rack about 6 inches from the heat source.
Broil the cauliflower until browned, 20 to 30 minutes.
Meanwhile, heat olive oil in a large soup pot, and cook the onion until translucent, about 5 minutes; stir in the garlic and roasted cauliflower. Pour in the water, season with salt and black pepper, and simmer until all the vegetables are tender, about 30 minutes.
Blend the soup in the pot with an immersion hand blender until creamy and smooth.
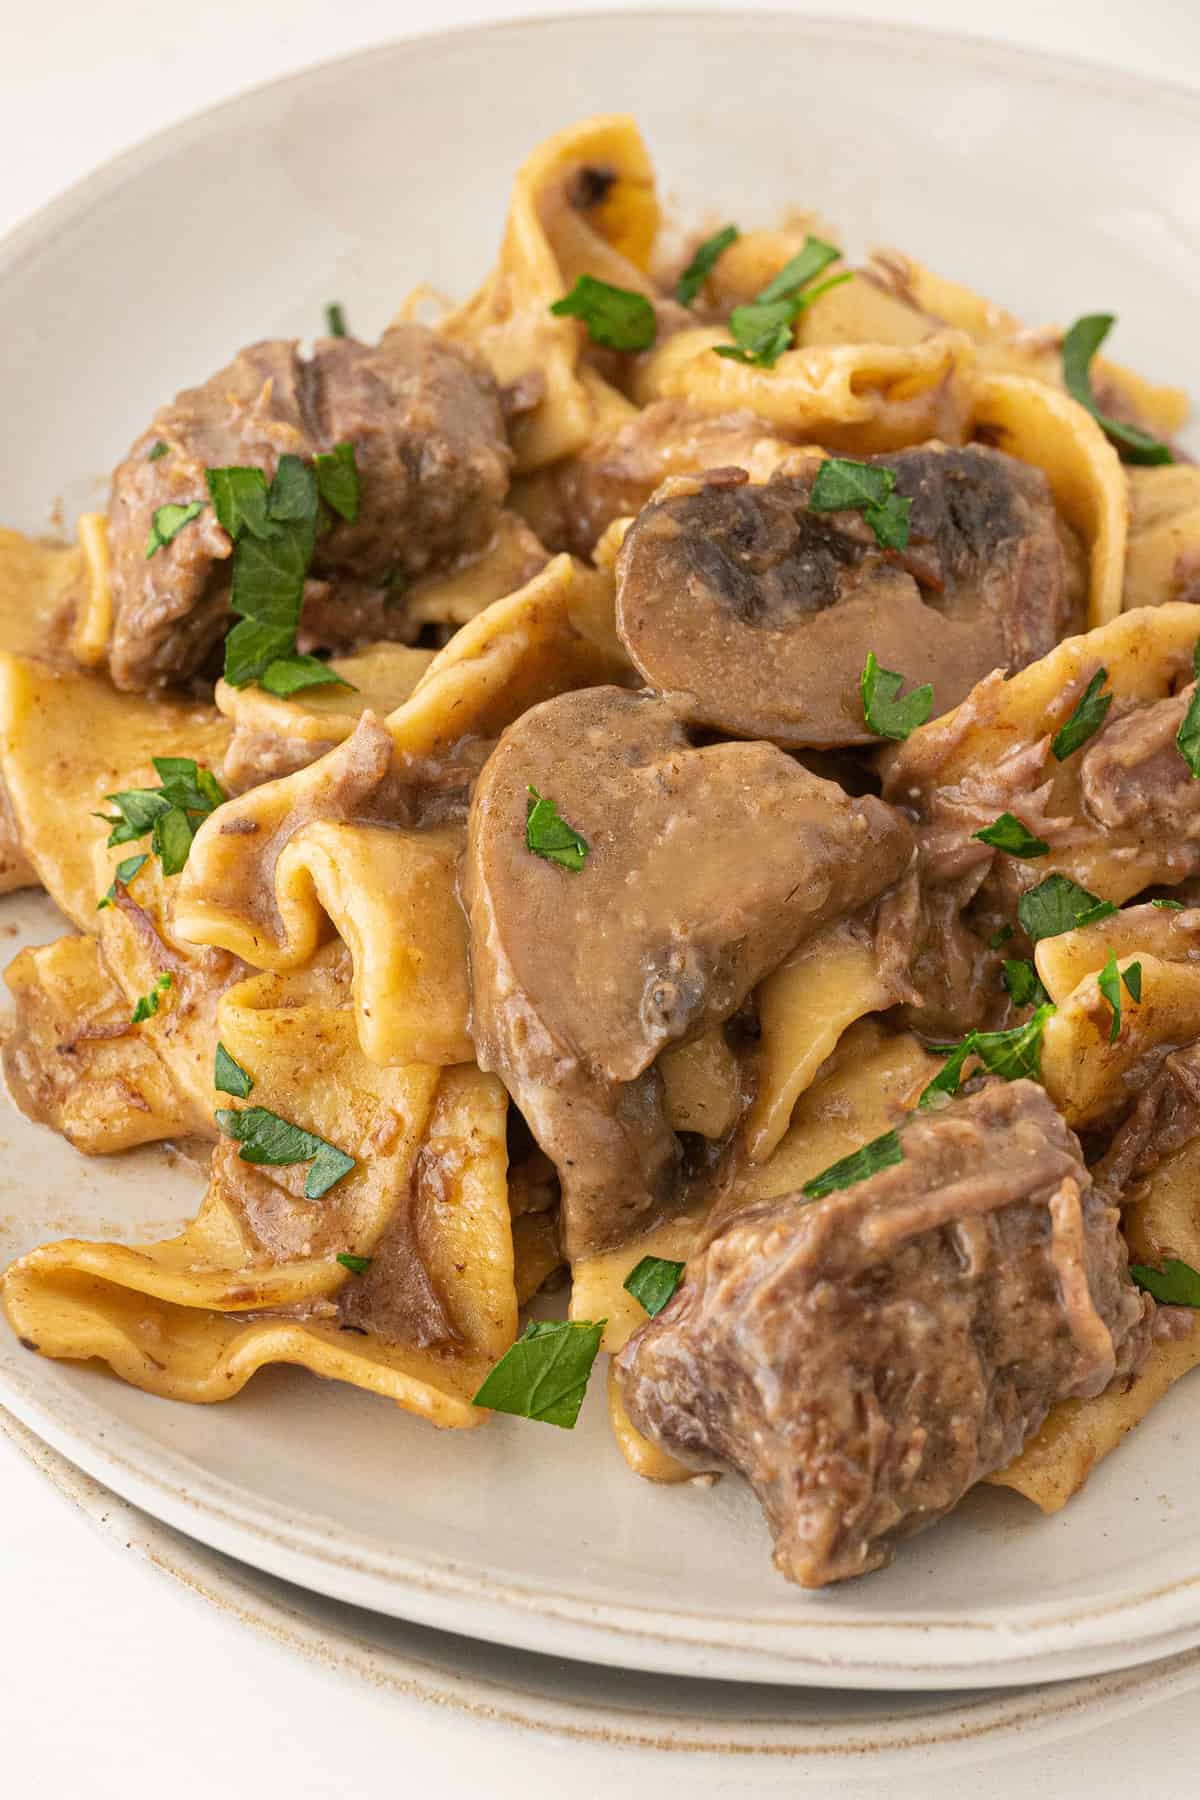
Beef Stroganoff has its origins in Eastern Europe and is basically just any sautéed beef dish served with a sauce enriched with sour cream.
This recipe uses a few classic ingredient additions, such as mushrooms and plenty of onion and garlic, along with a few modern twists for flavor like cream cheese and Worcestershire sauce.
It might not be the most completely authentic version, but it is without a doubt the most delicious. Plus, thanks to the Instant Pot, it is insanely easy to make, requiring almost no time at all.
Instant Pot Beef Stroganoff Ingredients
Make sure you look at the recipe card at the very bottom for the exact amounts, as there are a few fiddly ingredients here.
• Beef stewing meat
• Salt
• Ground black pepper
• Flour
• Canola oil
• White onion
• White mushrooms
• Garlic
• Beef broth
• Worcestershire sauce
• Egg noodles
• Sour cream
• Cream cheese
• Minced parsley
Cornstarch Slurry
• Cold water
• Cornstarch
How To Make Instant Pot Beef Stroganoff
• Whisk together the salt, pepper, and flour
• toss the cubed beef in the flour mixture until coated
• Press the sauté button on your instant pot and heat the oil
• Add in the onions and sauté for 5 minutes until they begin to soften
• Add the floured beef and cook until evenly browned for about 3-4 minutes
• Sauté the garlic until fragrant
• Slowly pour some of the beef broth into the bottom of the pot, scraping off all of the browned bits and onions, deglazing the bottom until it’s cleaned off. Don’t remove the beef; just scrape underneath it
• Add in the mushrooms, Worcestershire sauce, and any remaining beef broth
• Change the Instant Pot to manual setting, adjust the pressure to high, and set time for 20 minutes
• Once it’s done, use the quick-release and then stir in the egg noodles
• Set to high for a further 5 minutes
• Once done, release with quick-release again, and then check the liquid, thickening with cornstarch slurry as needed
• Once thickened, stir in the sour cream and cream cheese until melted, and then season with salt & pepper and serve hot
To make the best stew, you have to use the right cut of beef so your stewed meat turns out tender, not tough. But you might be surprised to learn that the best cuts of beef for stew always start out as the toughest. Here’s why. Stewing — or braising — meat means you’re cooking it with a little liquid at low temperature for an extended period of time — what I like to call low and slow. This cooking method breaks down the fibrous connective tissue (collagen) in the meat over time, making it literally fork-tender. So, the more collagen in the meat, the better the stew. And which cuts of meat are high in collagen? Beef chuck from the shoulder and beef bottom round from the rear.
Tip: Always buy a whole piece of beef chuck or beef bottom round and cut it up yourself instead of buying packaged pre-cut “stew meat,” which often is made of scraps of random beef cuts that will all cook up differently and may not necessarily turn tender.
2. Brown the Beef
Once you’ve cut up your beef into bite-size cubes (about 1 to 1½ inches), you’re going to amplify the flavor two ways: Season the meat and brown it.
Place the beef cubes in a large bowl and sprinkle with salt and pepper. If your recipe calls for coating the cubes with flour or other seasonings before searing, do it now. (The flour will help thicken the stew liquid as it braises.) Toss to coat all pieces evenly.
Heat fat or oil in a heavy skillet or Dutch oven over medium-high heat. Sear the beef cubes in small batches until they are dark brown on all sides. It’s important to work in small batches so you don’t overcrowd the pan or pot. If the beef is crowded, it will steam instead of sear, and the flour will end up pale and gummy.
If you’re making slow cooker beef stew, you’ll do this step in a separate skillet before adding the beef to the slow cooker. If you’re making Instant Pot beef stew, you can sear the beef in your Instant Pot using the sauté function.
Tip: For best results, sear the meat in an oil with a high smoke point to avoid scorching. Canola oil, safflower oil, or light/refined olive oil are among the good choices. You could also sear the meat in rendered bacon fat to add a touch of smoky flavor.
3. Add the Aromatics
After you remove the last batch of browned meat, you can use the fat that’s left behind to sauté onions and garlic if you’re using them in your recipe. Add the onions first and cook them, scraping the pot to loosen up all the tasty brown bits left behind from searing the beef. After about 10 minutes, add the garlic and cook for about 30 seconds.
4. Deglaze the Pan
After all that searing and sautéing, the bottom of your skillet or pot will most likely be coated with a thin, crusty brown layer of cooked-on food. That, my friends, is flavor you don’t want to waste. This is when you deglaze your pan. Deglazing simply means adding a bit of liquid to the hot pan and scraping to loosen up all the browned bits.
You can deglaze a pan with any liquid, including stock and wine. To concentrate the flavor, boil the liquid in the hot pan until it’s almost but not quite evaporated. Don’t worry — you’ll add a little more liquid in the next step.
If you’re finishing your stew in a slow cooker, transfer the beef, onions, garlic, and deglazed liquid to your slow cooker now.
5. Add Liquid and Seasonings
Add the herbs, spices, and other seasonings along with the braising liquid your recipe calls for.
If you’re braising the stew on your stovetop, bring to a boil, cover, and reduce the the heat to a low simmer. Follow recipe directions for cook time.
If you’re braising the stew in the oven (my preferred method), bring to a boil, cover, and place the pot in a preheated 350 degrees F (175 degrees C) oven or lower, depending on recipe directions. Follow recipe directions for cook time.
If you’re braising the stew in a slow cooker or Instant pot, follow recipe directions for cook time.
6. Add Potatoes and Carrots
While the stew is braising, peel the root vegetables such as potatoes, carrots, or parsnips to add to the stew. Cut them into to 1-inch chunks.
After the stew has braised on the stovetop or in the oven for about 1½ hours, stir in the root vegetables, cover the pot and continue braising until the vegetables are tender, usually for about 30 minutes more.
If you’re using a slow cooker or Instant Pot, follow your recipe’s directions for when and how to add the root vegetables, and how long to cook them.
Tip: The kind of potatoes you use makes a difference in your stew. Waxy potatoes such as Yukon Golds will hold their shape during braising. Russet potatoes (aka Idaho or baking potatoes) will break down and dissolve at the edges.
7. Finishing Touches
When your stew is cooked and ready to serve, there are a couple of things you can do to give it that final boost of flavor and texture.
Stir in fresh or frozen peas (optional).
Add fresh herbs such as parsley, rosemary, and thyme.
How to Thicken Up Beef Stew
If your beef stew sauce isn’t quite as thick as you’d like it to be, you can thicken it with one of the following methods:
Whisk a teaspoon of cornstarch with enough water to make a slurry. Stir it into the simmering stew and let it cook until the sauce is thickened.
Mash 2 tablespoons of softened butter with 2 tablespoons all-purpose flour to make kneaded butter (beurre manié). Break up into tiny bits and whisk them into the hot stew liquid. Simmer on low until the sauce is thickened and the flour taste is cooked out.
Remove a few potato chunks and mash them until smooth. Stir back into the sauce.
These super fudgy brownies are the richest and most “fudgy ” brownies on the planet and surprisingly gluten free.
Ingredients
12 oz semi-sweet chocolate chips
6 tbsp unsalted butter
1/4 cup unsweetened cocoa powder
1/3 cup cornstarch
1/2 tsp salt
3/4 cup granulated sugar
1 tsp vanilla extract
3 large eggs room temperature
Instructions
Preheat oven to 350F.
Lightly spray an 8-inch square baking pan with cooking spray. Line with parchment paper leaving an overhang for easy removal. Set aside.
Cut butter into small cubes.
In a large bowl, combine chocolate chips and butter. Melt in 30-second increments, on high heat in the microwave, stirring in between. (Estimated time is 1 minute)
Stir in sugar and vanilla until completely combined.
Add eggs one a time, stirring in between until combined.
In a small bowl, whisk together cocoa powder, cornstarch, and salt.
Add dry mixture to wet mixture and stir vigorously until the mixture is smooth and begins to pull away from the sides of the bowl. This takes 1-2 minutes.
Pour brownie batter into the prepared pan and smooth the top with a spatula.
Bake for 33-37 minutes or until an inserted toothpick comes out with a few moist crumbs.
Let brownies cool completely on a cooling rack.
Use the parchment paper overhang to pull the brownies out and cut into squares.
1 cup diced peeled apple (Granny Smith, Fuji, whatever you have on hand)
½ cup pecans chopped
Cream Cheese Glaze/Frosting
½ cup cream cheese softened
¼ cup butter softened
2 – 3 cups powdered sugar
1-3 tbsp orange juice as needed
Instructions
Preheat the oven to 350 degrees.
Grease and flour two 8×4 inch loaf pans. Line with parchment paper and set aside.
Place zucchini in a large kitchen towel. Bring up the four corners and twist. Squeeze the towel to extract all the liquid from the zucchini, or as much as you can. Set aside.
In a large bowl, whisk together flour, salt, baking powder, baking soda, cinnamon, cloves, and nutmeg together. Set aside.
In a separate large bowl, whisk together the butter and sugar.
Add eggs, orange juice, and vanilla and whisk until combined.
Fold dry ingredients into wet ingredients along with the shredded carrots, shredded zucchini, apples, and pecans.
Pour into prepared pans.
Bake until golden brown, 55 to 60 minutes, or until loaves spring back when gently pressed with fingers.
Let cool completely before icing.
Cream Cheese Glaze/Frosting
Cream together cream cheese and butter with a hand mixer.
Add in 2 cups of powdered sugar and continue mixing. Drizzle in orange juice until desired consistency is achieved.
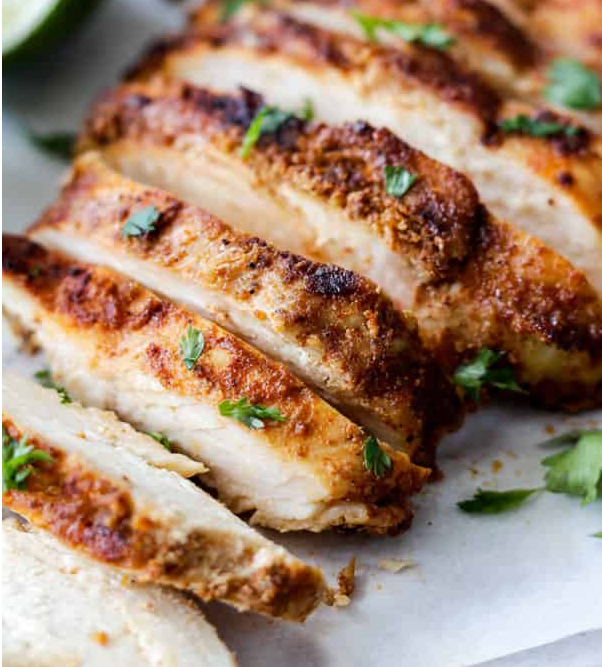
ENJOY OUR CHIPOTLE CHICKEN RECIPE SEEPING WITH FLAVOR, AS A MEAL ALL IN ONE OR INSTANTLY TRANSFORMS TACOS, BURRITOS, SALADS, BOWLS, ETC INTO THE MOST EPIC TACOS, BURRITOS, SALADS, BOWLS EVER!
¼ cup distilled white vinegar or apple cider vinegar
4-6 garlic cloves, minced
4 tablespoons vegetable oil or grapeseed oil
2-3 tablespoons water
Instructions
Pound chicken using mallet until even thickness, about a half inch thick. Tip | place chicken in freezer ziplock baggie or between two sheets of plastic wrap before pounding.
In a small mixing bowl, add all spices, garlic, oil, vinegar and water together, mixing well.
Pour over chicken placed in freezer bags or in baking dish, lifting and moving to make sure all chicken is covered in marinade. Best if marinated for 6 hours, but tastes decent at 3-4 hours too. If marinating in dish, be sure to occasionally turn the chicken.
Heat grill to medium heat and grill for 5-6 minutes per side until cooked through, if grilling thighs, and they are thin, reduce time to 3-5 minutes per side. Remove from grill, allow to rest 5 minutes covered before chopping into bite sized pieces.