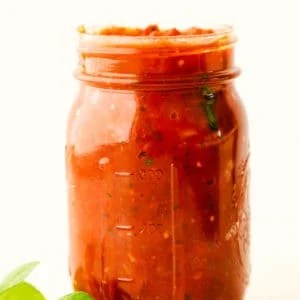
EASIEST HOMEMADE MARINARA

Making your own marinara sauce at home is easier than you think. With just a few simple ingredients, you can have a delicious and fresh sauce that is perfect for pasta, pizza, or as a dipping sauce for breadsticks. All you need is a can of crushed tomatoes, some garlic, olive oil, and a few dried herbs such as basil and oregano.

Start by sautéing the minced garlic in olive oil until fragrant. Then add the crushed tomatoes and herbs, simmering the sauce for about 20-30 minutes to let the flavors meld together. You can also season with salt and pepper to taste. If you prefer a smoother sauce, you can blend it with an immersion blender or in a traditional blender.

Once the marinara sauce is ready, you can use it immediately or store it in the refrigerator for later use. It’s a great way to elevate your dishes with a homemade touch and you can customize the flavors to suit your taste preferences. Homemade marinara sauce is a versatile and delicious addition to any recipe.

Ingredients 

  • 2 Tablespoons Olive Oil
  • 1 small Yellow Onion finely diced
  • 2 15-ounce cans of Stewed Tomatoes
  • 1 6-ounce can of Tomato Paste
  • 1 Tablespoon Italian Seasoning
  • 3 Garlic Cloves minced
  • 1 teaspoon Salt
  • 1/4 teaspoon Pepper
  • 1 Tablespoon Sugar
  • 1/2 cup Chicken Broth or Water

Instructions 

  • In a medium-sized saucepan over medium-high heat add the olive oil and onions. Sauté until tender.
  • In a food processor or blender add the stewed tomatoes, tomato paste, Italian seasoning, garlic, salt, pepper, and sugar. Pulse until smooth.
  • Add onions to the saucepan and add chicken broth. Sauté for 10 minutes to let the flavors blend.

Nutrition

Serves: 16

Calories 22k cal (1%) Carbohydrates 2g (1%) Protein1 g (2%) Fat2g (3%) Saturated Fat1 g (5%) Sodium 147mg (6%) Potassium 13mg Fiber 1g (4%) Sugar1g (1%) Vitamin A5IU Vitamin C 1mg (1%) Calcium 7mg (1%) Iron 1mg (6%)

All nutritional information is based on third-party calculations and is only an estimate. Each recipe and nutritional value will vary depending on the brands you use, measuring methods, and portion sizes per household.

Cool Whip No Bake Cheesecake

The Cool Whip No Bake Cheesecake is a delicious and convenient dessert option for those who love the creamy and rich flavor of cheesecake. This no-bake version eliminates the need for a traditional oven-baked crust, making it a quick and easy dessert to whip up for any occasion. With the addition of Cool Whip, the cheesecake has a light and fluffy texture that is sure to please even the pickiest of eaters.

One of the best things about the Cool Whip No Bake Cheesecake is its versatility. You can easily customize the flavor by adding different mix-ins or toppings, such as fresh fruit, chocolate ganache, or caramel sauce. This allows you to create a dessert that suits your personal taste preferences or to match the theme of a specific event. Whether you prefer a classic New York-style cheesecake or want to experiment with unique flavor combinations, this recipe is a great starting point.

Overall, the Cool Whip No Bake Cheesecake is a fantastic option for anyone looking for a delicious and stress-free dessert option. With its light and airy texture, customizable flavor profile, and simplicity of preparation, this cheesecake is a crowd-pleaser that is sure to impress your family and friends. Give it a try for your next gathering or special occasion and enjoy the delectable taste of this no-bake treat.

What You Need
1 pkg (250 g) Philadelphia Brick Cream Cheese, softened
1/4 cup granulated sugar
1 tub (1 L) thawed Cool Whip, Whipped Topping
1 ready-to-use 9 in (23 cm) Honey Maid Graham Pie Crust
fresh fruit or canned pie filling

Make It
BEAT cream cheese and sugar until smooth and creamy.
STIR in whipped topping and spoon into crumb crust.
Chill for 3 hours.
Top with fruit or pie filling.

DIY Rice water for your hair!

Make your own rice water. Great for hair or even fertilizer for your plants.

Ingredients:

  • 1/2 cup of rice
  • 2 cups of water
  • Stainer
  • 2 bowls
  • 1 container with a lid
  • A spray bottle

Directions for Soaking:

  • Pour ½ cup of uncooked rice in a strainer
  • Rinse well
  • Place rice in a bowl with 2 cups of water
  • Soak for up to 24 hours at room temperature
  • Strain the rice water into a clean bowl
  • Funnel rice into a spray bottle and refrigerate until you’re ready to use

Directions for Boiling:

  • Pour ½ cup of uncooked rice in a strainer
  • Rinse well
  • Boil 2 cups of water
  • Pour rice into boiling water and boil into the water is cloudy
  • Let the water cool
  • Strain
  • Funnel into a spray bottle
  • Refrigerate until use (up to a week, max)

Instructions:

  • Wash hair with shampoo and rinse
  • Towel dry hair
  • Pour the rice water onto the hair
  • Massage into hair and scalp
  • Cover with a plastic cap or bag (a shower cap works, too)
  • Leave on for up to 20 minutes
  • Rinse thoroughly with warm water and style as desired

Pepper Steak

This pepper steak recipe is loaded with tender beef, onions, and green peppers in a delicious tomato gravy that is best served over rice or egg noodles.

Ingredients 

  • 1.5 pounds beef sirloin tips or round steak cut into strips across the grain
  • salt and pepper
  • 2 tablespoons butter
  • 1 cup onion thinly sliced
  • 1 tablespoon paprika
  • 2 large garlic cloves minced
  • 1 1/2 cups beef broth
  • 1 medium green bell pepper cut into strips
  • 1 medium yellow or red bell pepper cut into strips ( optional )
  • one 14.5 ounces can of diced tomatoes

Cornstarch Slurry

  • 2 tablespoons cornstarch
  • 2 tablespoons soy sauce
  • 1/3 cup cold water
  • Cooked rice to serve it on

Instructions 

  • Season your beef tips with salt and pepper.
  • In a large, lidded skillet heat the butter until melted. Add in the beef and onions and sauté until browned. Add in the paprika and garlic and sauté until browned and fragrant.
  • Add a small amount of the broth into the pan, and using a wooden spoon scrape the browned bits off the bottom and into the broth. Add all the broth and stir.
  • Cover and simmer on low heat until the meat is almost fully tender, around 25 minutes. If needed add beef broth to continue cooking the beef until tender.
  • Add the tomatoes, and green pepper and cook for another 10-15 minutes until the peppers are tender-crisp.
  • Whisk together the ingredients for the cornstarch slurry. Whisk into the meat mixture and bring to a low boil Simmer for another 5 minutes until thickened. Season to your liking with salt and pepper.
  • Serve over rice or egg noodles.

Recipe Notes

  • Make your own beef broth with a bouillon cube or concentrated beef bullion added to water

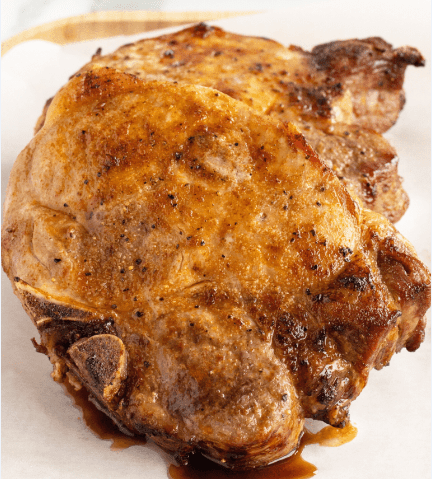
Pork Chops – Air Fryer

Delicious pork dish that cooks up quick !

Ingredients 

  • 2 Bone-in pork chops (1½ – 2 inches thick)
  • 2 Tablespoons olive oil
  • 2 Tablespoons Pork chop seasoning
  • 1½ Tablespoons brown sugar

Instructions 

  • Preheat the air fryer to 400°.
  • Pat dry the pork chops completely with a paper towel.
  • mix together, in a small bowl, the pork chop seasoning and the brown sugar.
  • Coat the pork chops with olive oil on all sides, rubbing it all over.
  • Sprinkle the pork chops with the seasoning blend and rub the mix well into the pork chops using all of the seasoning mixes.
  • Cook the pork chops in your air fryer at 400° for 6 minutes, then flip the pork chops over and continue to cook for another 6-7 minutes. The pork chops are cooked when a minimum internal temperature of 145° is reached.
  • Remove from the air fryer and let them rest for 5 minutes covered, then serve.
  • Garnish with sprigs of parsley on the plates.

Always put any leftovers immediately into your fridge or cooler in a sealed container. Should stay good (cooked) for 3 days.

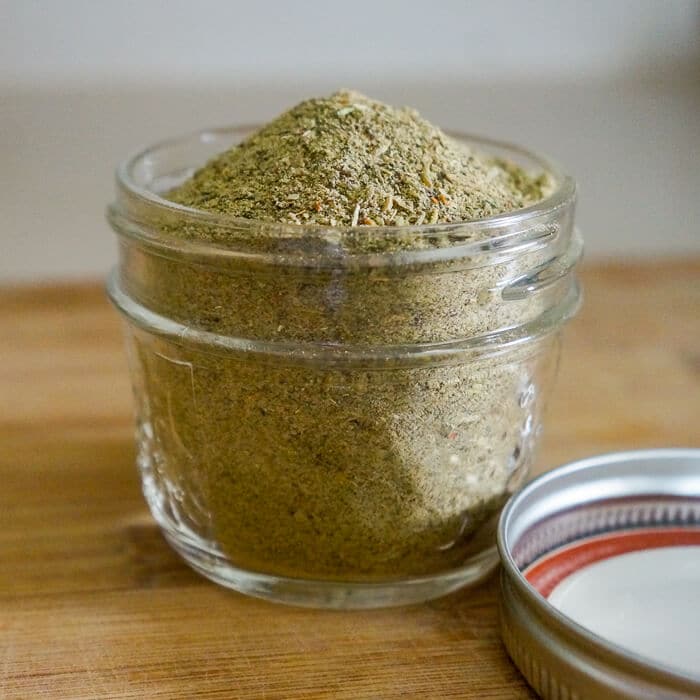
Italian Seasoning

Ingredients 

  • 2 tablespoons dried basil
  • 2 tablespoons dried oregano
  • 2 tablespoons dried rosemary
  • 2 tablespoons dried marjoram
  • 2 tablespoons dried sage
  • 2 tablespoons dried thyme
  • 2 tablespoons dried savory

Instructions 

  • Combine all of the seasonings together and store them in a closed container for up to a year. Storing them longer however does affect the potency of the seasoning.

Recipe Notes

You have two choices when making this, you can put it all in a food processor and grind it up until it’s more powdery, or you can use it as-is. I don’t mind rosemary being larger in my seasonings, but you can grind it all up if you prefer! 

Nutrition Information

Calories: 8kcal, Carbohydrates: 2g, Protein: 1g, Fat: 1g, Saturated Fat: 1g, Sodium: 1mg, Potassium: 42mg, Fiber: 1g, Sugar: 1g, Vitamin A: 102IU, Vitamin C: 1mg, Calcium: 55mg, Iron: 2mg

All calories and info are based on a third-party calculator and are only an estimate. Actual nutritional info will vary with the brands used, your measuring methods, portion sizes, and more.

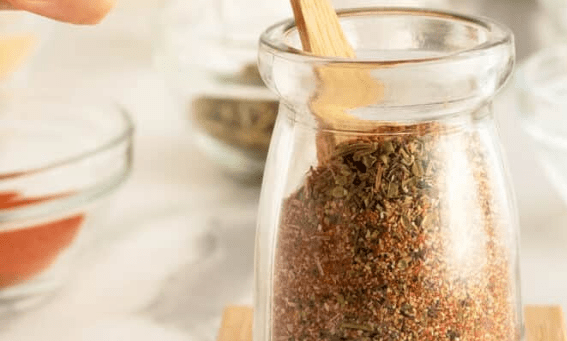
Shrimp Seasoning

Ingredients 

  • 2 tablespoons garlic powder
  • 2 tablespoons Italian seasoning
  • 1 tablespoon paprika
  • 1 teaspoon smoked paprika
  • 1 teaspoon ground black pepper

Instructions 

  • Whisk together all ingredients.
  • Store in a closed container in a dark place.
  • Use to season shrimp in your favorite recipes.

Nutrition Information

Calories: 110kcal, Carbohydrates: 25g, Protein: 5g, Fat: 2g, Saturated Fat: 0.4g, Polyunsaturated Fat: 1g, Monounsaturated Fat: 0.3g, Sodium: 05mg, Potassium: 0mg, Fiber: 9g, Sugar: 2g, Vitamin A: 4614IU, Vitamin C: 1mg, Calcium: 206mg, Iron: 7mg

All calories and info are based on a third party calculator and are only an estimate. Actual nutritional info will vary with brands used, your measuring methods, portion sizes and more.

Simple Hot Cocoa

Makes a single cup of hot cocoa or hot chocolate with salt or preservatives.

Ingredients

  • 2 teaspoons of ground organic cocoa
  • 2 teaspoons of sugar or substitute
  • 1 cup of milk (or almond milk)
  • 1/4 teaspoon vanilla (optional)

Quick heat, mix and serve:

Mix all the dry ingredients together. Heat milk in the microwave for 1 minute or until hot. Add dry ingredients.

Stir in vanilla. Makes one cup.

CHICKEN CARBONARA

HOW TO MAKE THIS CARBONARA RECIPE WITH CHICKEN

  1. Cook the pasta in salted water according to the package directions. When the pasta has finished cooking, reserve 1/2 cup of pasta water in a jug, then drain. Whisk the reserved pasta water with the cornstarch until no visible lumps; Set aside until ready to use.
  2. Preheat the oil in a large skillet over medium heat. Add chicken and sprinkle with paprika, salt, and pepper. Cook, stirring occasionally, until golden brown.
  3. Stir in the peas and garlic and sauté for 1 minute, or until the garlic releases, its flavor. Meanwhile, add the cornstarch to the remaining pasta water and whisk until no visible lumps.
  4. 4. Pour the pasta water slurry, milk, and broth and stir well to combine. The sauce should start to thicken almost immediately.
  5. 5. Once the sauce is thick and coats the back of the spatula, stir in the cooked pasta.
  6. 6. Sprinkle the pasta with parmesan and parsley and serve while hot.

TIPS FOR SUCCESS

  1. To make sure there are no lumps, add the pasta water a little at a time to make the cornstarch slurry before pouring it back in with the other ingredients.
  2. Use your favorite pasta shape! Macaroni, ziti, and rigatoni are all perfect for this chicken carbonara recipe. You could even try it with fettuccine, linguine, or spaghetti!
  3. Make it gluten-free: All you have to do is swap the penne for a gluten-free substitute.
  4. Make it vegetarian: If you’d like to make a vegetarian carbonara instead, skip the chicken or use a meat-free substitute, and add vegetable broth instead of chicken broth.
  5. Add a little spice! Sprinkle a pinch or two of red pepper flakes if you enjoy a little heat.
  6. Toss in some more veggies! Corn and diced red or yellow peppers are delicious in pasta carbonara.
  7. Store any leftover chicken carbonara in the fridge for up to 4 days.
  8. Reheat in the microwave or in the oven covered with aluminum foil until piping hot.

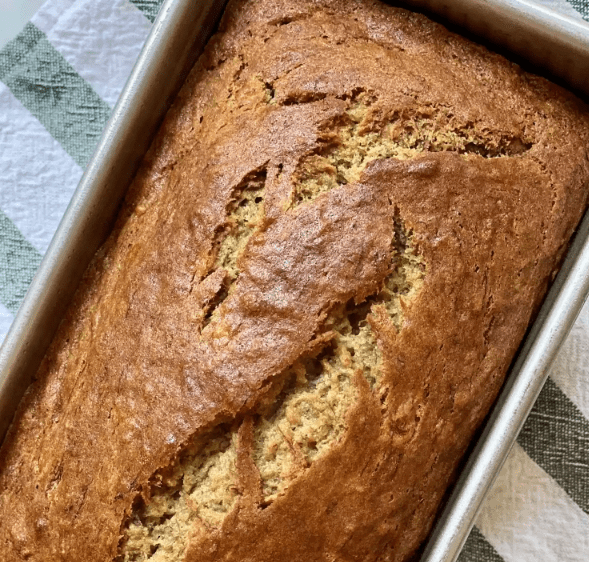
Gluten-Free Banana Bread

Ingredients

  • 3 to 4 medium overripe bananas, mashed (1 1/2 cups)
  • 1/3 cup unsalted butter, melted
  • 3/4 cup granulated sugar
  • 1 large egg, beaten
  • 1 teaspoon vanilla extract
  • 1 1/2 cups gluten-free all-purpose flour
  • 3/4 teaspoon baking soda
  • 3/4 teaspoon baking powder
  • 1/2 teaspoon salt

Method

  1. Preheat oven to 350°F.
  2. Prepare the loaf pan: Grease an 8×4-inch loaf pan generously with cooking spray.
  3. Mix the wet ingredients: In a large mixing bowl, add mashed bananas and stir in melted butter, sugar, egg, and vanilla.
  4. Mix the dry ingredients and combine them. In a smaller bowl, add flour, baking soda, baking powder, and salt. Whisk to combine. Add the flour mixture to the larger bowl with the wet ingredients and stir until fully combined. (Note that it will be slightly lumpy because of the pieces of mashed banana.)
  5. Bake: Pour batter into the prepared loaf pan, scraping the bowl to assist. Bake for 50 minutes to 1 hour, or until a tester comes out clean.
  6. Serve: Cool on a rack for at least 15 minutes before removing the loaf from the pan. Cool completely before slicing and serving.

Banana Bread Swaps and Substitutions

If you’re looking for classic banana bread, this is it. But, if you want to jazz it up, the sky’s the limit!

  • Add some mix-ins: You could add 1 teaspoon cinnamon and 1/2 teaspoon nutmeg, 1/2 cup walnuts or pecans, and or 1/2 cup chocolate chips
  • Swap the sugar: You can also adjust the amount of sugar to your liking and even swap one sugar for another. Try raw or brown sugar for an added caramel-like flavor.
  • Make it dairy-free: If you’re dairy-free and avoiding butter, use equal parts coconut, olive, or vegetable oil instead.

How to Store and Freeze Banana Bread

It’s best to store banana bread covered on your countertop. It should last up to 5 or 6 days that way, but it’s best within the first 3 to 4 days. It is still perfectly edible after day 4, but it might start to dry out.