Sweetened Condensed Milk

Introduction:
Sweetened condensed milk is a rich, creamy, and sweet ingredient often used in desserts, beverages, and baking recipes. Making it at home is easier than you might think! This homemade version is perfect for those who want a natural alternative without preservatives. With just a few ingredients, you can create a delicious batch of sweetened condensed milk to use in a variety of recipes, or enjoy it straight from the jar.


Ingredients:

  • 1 cup powdered milk
  • 2/3 cup granulated sugar
  • 1/3 cup boiling water
  • 3 tablespoons melted butter

Instructions:

  1. Combine Ingredients:
  • In a blender, add the powdered milk, granulated sugar, boiling water, and melted butter.
  1. Blend Until Smooth:
  • Blend the mixture on high speed until smooth and creamy. This should take about 2-3 minutes. Make sure all ingredients are well combined.
  1. Let It Cool:
  • Once blended, pour the mixture into clean, sterilized jars. Let it cool to room temperature before sealing the jars.
  1. Storage:
  • Store the homemade sweetened condensed milk in the refrigerator for up to 2 weeks.

Tips:

  • For a thicker consistency, let the sweetened condensed milk chill in the refrigerator for a few hours before use.
  • Adjust the sugar level to your taste by adding a bit more or less as desired.
  • Use this homemade condensed milk in coffee, tea, or desserts like fudge, cakes, and ice cream!

Your homemade sweetened condensed milk recipe sounds like a dream for dessert lovers! It’s not only simple to make but also free from unnecessary additives. Here are a few extra tips and variations to make it even more exciting:

Tips:1. Blending: If you don’t have a blender, a whisk and some elbow grease can also do the trick, although it might take a bit longer.

  1. Storage: If the condensed milk thickens too much in the refrigerator, you can warm it slightly in a microwave or on the stovetop to make it easier to pour.

Variations:1. Vanilla Sweetened Condensed Milk:

  • Add 1 teaspoon of vanilla extract to the mixture before blending for a delightful vanilla flavor.
  1. Chocolate Sweetened Condensed Milk:
  • Add 2 tablespoons of unsweetened cocoa powder to the blend for a chocolate twist. Perfect for making fudge or adding to coffee.
  1. Dairy-Free Sweetened Condensed Milk:
  • Use coconut milk powder and coconut oil instead of powdered milk and butter for a vegan version with a hint of coconut flavor.
  1. Flavored Sweetened Condensed Milk:
  • Try adding a few drops of almond, hazelnut, or coconut extract to create different flavors that can enhance your desserts and beverages.

Your homemade sweetened condensed milk can now be a versatile ingredient in your culinary adventures. Enjoy experimenting and creating delicious treats! 🍮🧁☕️

Storing your homemade sweetened condensed milk properly ensures it stays fresh and delicious. Here’s how you can do it:

Short-Term Storage– Refrigerator: Once you’ve made your sweetened condensed milk, pour it into a clean, sterilized jar or airtight container. Store it in the refrigerator for up to 2 weeks. Before using, give it a good stir to ensure it’s smooth and creamy.

Long-Term Storage– Freezer: For longer storage, you can freeze the sweetened condensed milk. Pour it into a freezer-safe container, leaving a little space at the top to allow for expansion. It can be stored in the freezer for up to 3 months. When you’re ready to use it, thaw it in the refrigerator overnight and stir well before using.

Additional Tips:– Avoid Contamination: Use a clean spoon each time you scoop out some of the milk to avoid introducing any bacteria.

  • Consistency: If the condensed milk thickens too much while refrigerated, you can warm it slightly in the microwave or on the stovetop until it reaches your desired consistency.
  • Labeling: Don’t forget to label your containers with the date you made it to keep track of its freshness.

With these tips, your homemade sweetened condensed milk will be ready to enhance all your favorite recipes whenever you need it! 🍬🧁☕️

Ginger Water

Ginger Water, The Healthiest Drink to Burn Fat and Tone Your Body

For centuries, ginger has held a special place in traditional medicine. From ancient Ayurvedic practices in India to Chinese herbal remedies, this root has been trusted for its ability to ease nausea, soothe digestion, and reduce inflammation. But in recent years, ginger has gained new attention for another surprising benefit: its potential role in weight management. One of the simplest ways to tap into ginger’s power is by drinking ginger water—a refreshing, natural infusion that’s both easy to make and packed with health benefits.

What Exactly Is Ginger Water?

At its core, ginger water is nothing more than sliced or grated ginger root steeped in hot or cold water. But don’t be fooled by the simplicity. Ginger contains a powerful compound called gingerol, which is known for its antioxidant, anti-inflammatory, and thermogenic (fat-burning) properties. This combination makes it a drink that supports not only overall wellness but also metabolic health.

For anyone struggling with stubborn belly fat, bloating, or that sluggish feeling after meals, ginger water may help the body reset, energize, and burn calories more efficiently.

How Ginger Water Supports Weight Loss

1. It Boosts Metabolism
One of the most talked-about effects of gingerol is its ability to gently increase body temperature, triggering a thermogenic response. This essentially means your body burns more calories, even at rest. While it’s not an overnight solution, consistent use may support gradual fat reduction when combined with a balanced diet and regular movement.

2. It Curbs Hunger and Cravings
Sipping ginger water before meals may help you feel fuller, making it easier to avoid overeating. This natural appetite control is one reason many people find ginger water useful in their weight loss journey.

3. It Improves Digestion
Ginger stimulates the digestive system, encouraging smoother movement of food through the stomach and intestines. This reduces bloating, eases discomfort, and can help create a flatter stomach over time. Better digestion also means your body absorbs nutrients more effectively.

4. It Helps Balance Blood Sugar
Stable blood sugar is critical for avoiding sudden energy crashes and sugar cravings. Some studies suggest ginger can help regulate insulin activity, making it a supportive drink for both weight management and overall metabolic health.

5. It Reduces Inflammation and Water Retention
Many people mistake inflammation and water retention for extra weight. Ginger’s natural anti-inflammatory effects may reduce puffiness, ease swelling, and flush out excess fluids—particularly in the abdominal area.

How to Make Ginger Water

One of the best parts about ginger water is how easy it is to prepare at home.

Ingredients:

  • 1 to 2 inches of fresh ginger root, sliced or grated
  • 3 to 4 cups of water
  • Optional: a squeeze of fresh lemon or a teaspoon of raw honey

Instructions:

  1. Bring the water to a boil and add the ginger.
  2. Let it simmer for 10 to 15 minutes.
  3. Strain and let it cool slightly.
  4. Add lemon or honey if desired.
  5. Enjoy warm or store it in the fridge for a chilled version.

For best results, drink one cup in the morning on an empty stomach and another in the afternoon or before meals.

What People Are Saying

Those who’ve added ginger water to their daily routine often report a wide range of benefits:

  • Less bloating and digestive discomfort
  • Increased energy throughout the day
  • A noticeable reduction in snacking between meals
  • Clothes fitting more comfortably after a few weeks
  • A lighter, less sluggish feeling overall

While experiences vary, many say ginger water became a small but impactful change that supported other healthy habits.

A Few Precautions

Even natural remedies should be used with care. While ginger water is safe for most people, drinking too much can cause mild side effects like heartburn or digestive upset. It’s best to start with one cup per day and adjust gradually.

Those on medications for blood pressure, diabetes, or blood thinning should check with a doctor before increasing ginger intake. Pregnant women are also advised to consult their healthcare provider.

Final Thoughts

Ginger water isn’t a magic potion that will melt away pounds overnight—but it is a powerful ally when paired with mindful eating, hydration, and regular movement. Affordable, easy to prepare, and versatile, it offers benefits that go well beyond weight loss. From boosting immunity to reducing nausea and improving gut health, this simple drink proves that sometimes the best wellness solutions are also the most natural.

If you’re looking for a gentle, supportive way to boost your health and slim down naturally, ginger water deserves a place in your daily routine. A small cup in the morning could be the first step toward feeling lighter, more energized, and more in tune with your body.

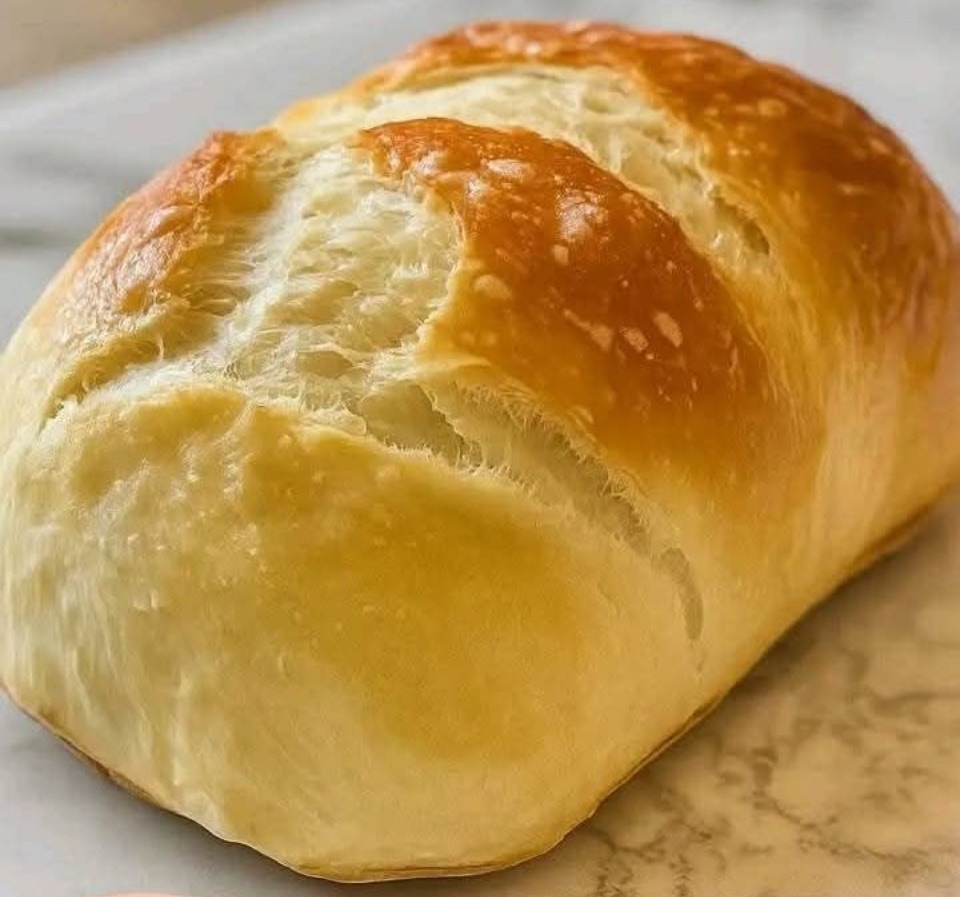
20 minute homemade bread

20-Minute Homemade Bread

Ingredients:

3 cups all-purpose flour

2 teaspoons baking powder

1 teaspoon salt

1 tablespoon sugar

1 cup warm water

2 tablespoons olive oil

Instructions:

  1. Preheat oven to 400°F (200°C).

Lightly grease a baking sheet or line it with parchment paper.

  1. Mix dry ingredients: In a large bowl, whisk together flour, baking powder, salt, and sugar.
  2. Add wet ingredients: Pour in warm water and olive oil. Mix with a spoon or spatula until dough forms.
  1. Knead: Lightly flour a surface and knead the dough for 1-2 minutes until smooth.
  2. Shape into a loaf or divide into rolls and place on the prepared baking sheet.
  3. Bake for 15-20 minutes, or until the top is golden and the loaf sounds hollow when tapped.
  4. Cool slightly before slicing and serving.
  5. Tips:
    Add herbs or garlic powder for extra flavor.
    This bread is best eaten warm, but can be reheated the next day.

Keto Chocolate Frosting

Delicious frosting that is sugar free option for our delicious brownies and deserts.

INGREDIENTS

1 1/2 cups Unsalted butter (softened)

10 tbsp Dutch processed cocoa powder (1/2 cup + 2 tbsp)

1/2 cup Besti Powdered Monk Fruit Allulose Blend

1 tsp Vanilla extract

1 tbsp Heavy cream

1 tsp instant coffee (optional)

Instructions

1 Using a hand mixer in a bowl, beat the butter for about 1 minute, until fluffy.

2 Beat in the cocoa powder, sweetener, and vanilla extract, starting at low speed and increasing to high once it gets incorporated. Beat for 30 seconds on high. *

3 Beat in heavy cream. (You can add more to thin out as needed.) Start low, then beat for 30 seconds on high again, until smooth and fluffy.

4 *add instant coffee after dissolving in hot water

Milk Chocolate Oatmeal Cookies

Delicious Oatmeal Cookies , great for any snack.

1½ cups all-purpose flour

½ tsp. baking powder

½ tsp. baking soda

½ tsp. ground cinnamon

½ tsp. salt

¼ cup (1½ sticks) butter, softened

½ cup packed brown sugar

½ cup granulated sugar

1½ tsp. vanilla extract

1 large egg

2 TBS. milk

1½ cups (11.5-oz. pkg.) NESTLÉ® TOLL HOUSE® Milk Chocolate Morsels

1 cup quick or old-fashioned oats

1/4 cup of raisins (optional)

Preheat oven to 375°F

In small bowl, combine flour, baking powder, baking soda, cinnamon and salt

In large mixing bowl, beat butter, brown sugar, granulated sugar and vanilla extract until creamy

Beat in egg

Beat in flour mixture and milk gradually

Stir in morsels, oats and raisins

Drop onto ungreased baking sheets by rounded tablespoon

Bake for 10 to 14 minutes or until edges are crisp but centers are still soft.

Cool on baking sheets for 2 minutes; remove to wire racks to cool completely.

Makes about 3 dozen cookies

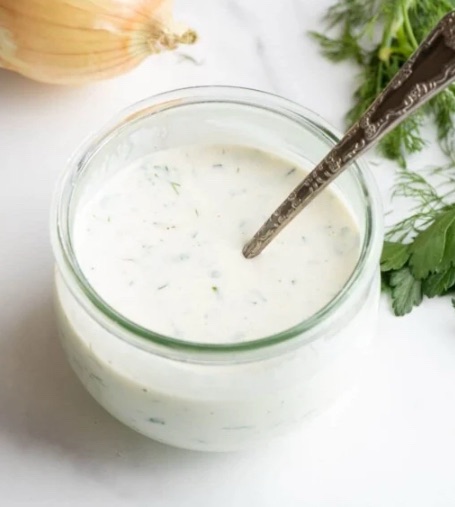
Ranch Dressing

Ingredients

3/4 cup Buttermilk

1/3 cup Mayonnaise

1/4 cup Sour cream

1 tablespoon chopped fresh Dill

2 Garlic cloves minced

1 tablespoon chopped fresh Italian Parsley

1/2 teaspoon Salt

1/2 teaspoon ground Black Pepper

1/2 teaspoon Onion Powder or Onion Salt

1/4 teaspoon dry Mustard Powder

Instructions

  1. Combine all ingredients in a medium mixing bowl.
  2. Whisk until smooth. Refrigerate until serving.
  3. Store refrigerated in an air-tight container for up to 5 days.

Nutrition

Calories: 54kcal | Carbohydrates: 1g | Protein: 1g | Fat: 5g | Saturated Fat: 1g | Cholesterol: 6mg | Sodium: 134mg | Potassium: 23mg | Fiber: 1g | Sugar: 1g | Vitamin A: 71IU | Vitamin C: 1mg | Calcium: 20mg | Iron: 1mg

Chicken Fritters

Ingredients

2 lb Boneless skinless chicken breast (finely diced into 1/4-inch pieces)

1 cup Mozzarella cheese (shredded)

1/4 cup Grated parmesan cheese

1/4 cup Wholesome Yum Blanched Almond Flour

3 tbsp Fresh chives (or more if you want them extra herby)

2 large Eggs

1/2 tsp Garlic powder

1/4 tsp Sea salt

1/4 tsp Black pepper

2 tbsp Olive oil

INSTRUCTIONS

Tap on the times in the instructions to start a kitchen timer.

1 In a large bowl, combine the chicken, cheeses, almond flour, chives, eggs, garlic powder, salt, and pepper. Mix well.

2 Cover the bowl with plastic wrap and refrigerate for at least 1 hour. (You can also do this overnight instead.)

3 Heat the olive oil in a large skillet over medium heat. Scoop about 1/4 cup of the mixture at a time onto the hot pan and use a spatula to flatten to 1/4-to-1/3-inch thickness. Fry for 3-4 minutes per side, until golden brown and cooked through. Drain the fritters on a paper towel lined plate.

4 Repeat with the remaining chicken mixture, until all your chicken fritters are done.

Servings – 2 fritters

Ultimate Beef Nachos

These loaded nachos are packed with flavorful seasoned beef, gooey cheese, and all your favorite toppings for the ultimate snack or meal!

Ingredients

For the Beef:

1 pound (80/20) ground beef

1 packet taco seasoning (or homemade: ½ tbsp cumin, ½ tbsp garlic powder, ½ tbsp onion powder, 1 tbsp smoked paprika, and a pinch of oregano)

½ cup water

1 can (15 oz) refried beans (optional for extra heartiness)

For the Nachos:

1 large bag low salt tortilla chips

2 cups low-fat shredded cheddar cheese (or a mix of cheddar & Monterey Jack)

1 cup low-fat shredded mozzarella cheese

½ cup low-fat nacho cheese sauce (optional)

Toppings:

1 cup diced tomatoes

½ cup diced red onion

½ cup sliced black olives

½ cup pickled jalapeños

1 avocado, diced (or guacamole)

½ cup low-fat sour cream

¼ cup chopped cilantro

Salsa & hot sauce (optional)

Instructions:

1. Cook the Beef: In a large skillet, cook ground beef over medium heat until browned. Drain excess fat. Add taco seasoning and water, simmer for 5 minutes until thickened. Stir in refried beans (if using) and set aside.

2. Assemble the Nachos: Preheat oven to 375°F. Spread tortilla chips on a large baking sheet. Layer with half of the shredded cheese, then add the seasoned beef, and top with remaining cheese.

3. Bake: Bake for 8-10 minutes or until cheese is melted and bubbly.

4. Add Toppings: Remove from oven and drizzle with nacho cheese sauce (if using). Top with tomatoes, onions, olives, jalapeños, avocado, and cilantro.

5. Serve: Drizzle with sour cream and serve with salsa and hot sauce on the side.

Enjoy these Epic Beef Nachos Supreme as the perfect party snack or game-day favorite! 😋

Tuna Melt Patties

Ingredients

2 cans (5 oz each) tuna, drained

1/2 cup breadcrumbs (panko or regular)

1 egg

1½ cup mayonnaise (see mayo recipe)

1 teaspoon Dijon mustard

1/2 teaspoon garlic powder

1/2 teaspoon onion powder

1½ teaspoon salt

1/4 teaspoon black pepper

2 tablespoons chopped green onions

1/2 cup shredded cheddar cheese

For Cooking:

2 tablespoons olive oil or butter For Serving:

4 hamburger buns or sandwich bread

4 slices cheddar or Swiss cheese

4 tomato slices (optional)

Lettuce leaves (optional)

Directions:

Prepare the Patties:

In a large bowl, mix drained tuna, breadcrumbs, egg, mayonnaise, mustard, garlic powder, onion powder, salt, pepper, green onions, and shredded cheddar cheese.

Form the mixture into 4 equal patties.

Cook the Patties:

Heat olive oil or butter in a skillet over medium heat.

Cook patties for 3-4 minutes per side until golden brown and heated through.

Melt the Cheese:

Place a slice of cheddar or Swiss cheese on top of each patty.

Cover the skillet for 30 seconds until the cheese melts.

Assemble & Serve:

Toast the buns if desired.

Place lettuce and tomato slices on the bottom bun, add the tuna melt patty, and top with the other half of the bun.

Serve warm with fries, salad, or chips.

Serve & Time:

Serves: 4

Prep Time: 10 minutes

Cook Time: 8 minutes

Total Time: 18 minutes

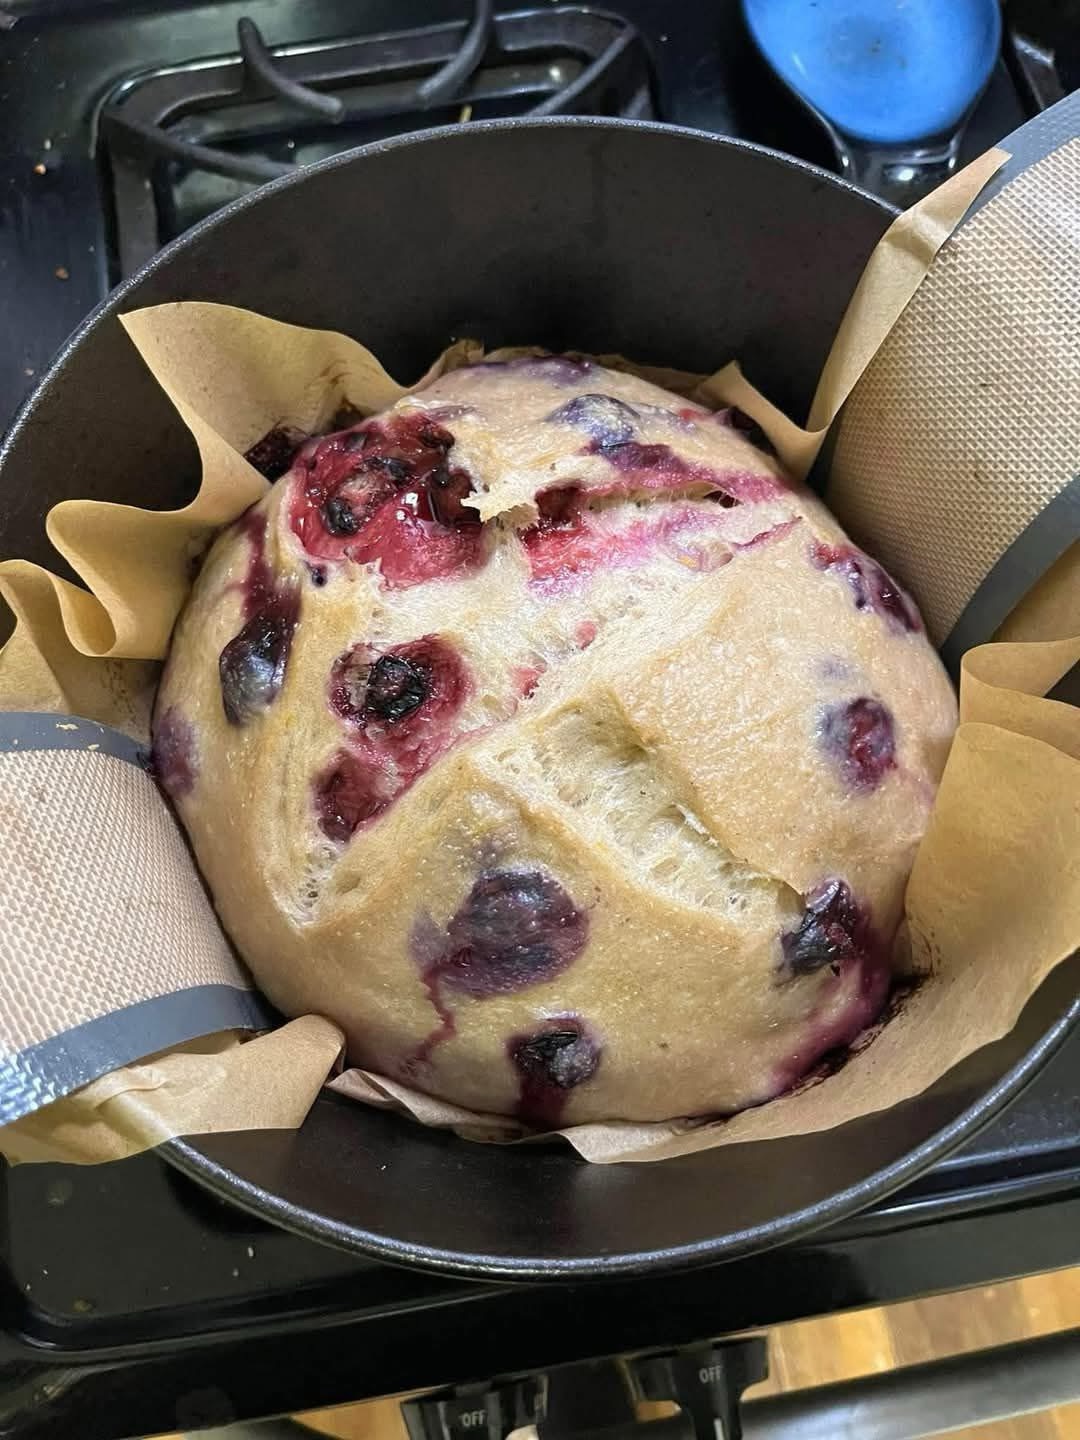
Lemon Blueberry Cream Cheese Sourdough

Ingredients:

For the Dough:

  • 1 cup active sourdough starter (fed and bubbly)
  • 1 cup warm water
  • 4 cups bread flour
  • 1 teaspoon salt
  • 1 tablespoon sugar

(optional, for a touch of sweetness)

For the Filling:

  • 8 oz cream cheese, softened
  • 1/4 cup powdered sugar
  • 1 tablespoon lemon juice
  • Zest of 1 lemon
  • 1 cup fresh blueberries

(you can use frozen, but fresh is best)

Instructions:

  1. Mix the Dough:
  • In a large mixing bowl, combine the active sourdough starter and warm water. Stir until well mixed.
  • Add the bread flour, salt, and sugar (if using).

Mix until a shaggy dough forms.

  1. Knead the Dough:
  • Turn the dough out onto a floured surface and knead for about 8-10 minutes until smooth and elastic. Alternatively, you can use a stand mixer with a dough hook.
  1. First Rise:
  • Place the dough in a lightly greased bowl, cover it with a damp cloth or plastic wrap, and let it rise at room temperature for about 4-6 hours, or until it has doubled in size.

4. Prepare the Filling:

  • While the dough is rising, prepare the cream cheese filling. In a medium bowl, mix the softened cream cheese, powdered sugar, lemon juice, and lemon zest until smooth and well combined. Set aside.
  1. Shape the Dough:
  • Once the dough has risen, gently punch it down to release the air. Turn it out onto a floured surface and shape it into a rectangle (about 12×18 inches).

6. Add the Filling:

  • Spread the cream cheese mixture evenly over the dough rectangle, leaving a small border around the edges.
  • Sprinkle the fresh blueberries over the cream cheese filling.
  1. Roll the Dough:
  • Starting from one long side, carefully roll the dough into a log, pinching the seam to seal. Tuck the ends under to form a loaf shape.

8. Second Rise:

  • Place the rolled dough seam-side down into a greased loaf pan. Cover it again and let it rise for another 1-2 hours, or until puffed.

9. Preheat the Oven:

  • Preheat your oven to 375°F (190°C) during the last 30 minutes of the second rise.
  1. Bake:
  • Once the dough has risen, bake in the preheated oven for 30-35 minutes or until the bread is golden brown and sounds hollow when tapped on the bottom.

11. Cool:

  • Remove the bread from the oven and let it cool in the pan for about 10 minutes. Then transfer it to a wire rack to cool completely.

12. Slice and Serve:

  • Once cooled, slice the bread and enjoy! This lemon blueberry cream cheese sourdough is perfect for breakfast or as a sweet treat.